
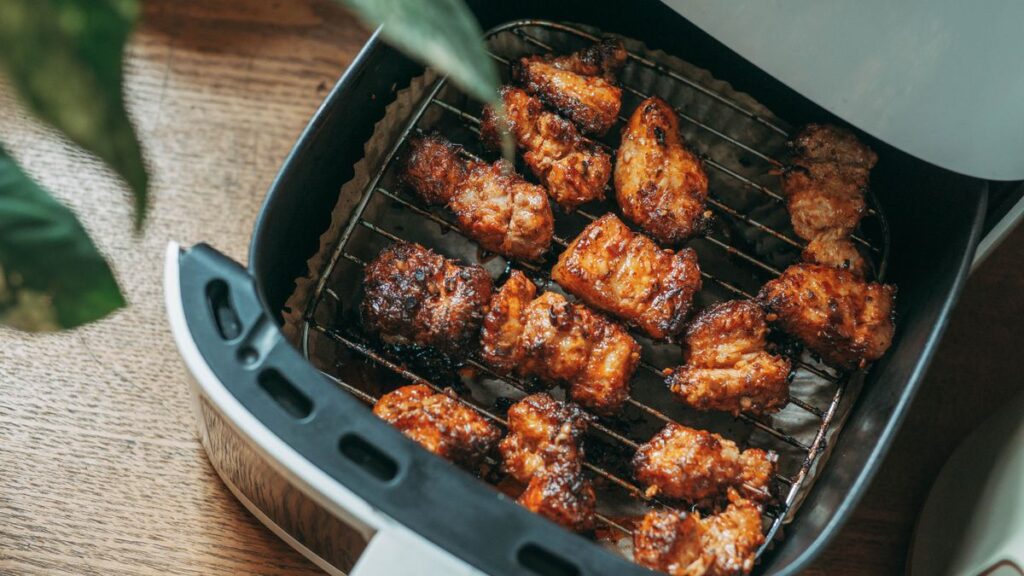
The dehydrator vs air fryer question arises every time someone eyes the \”dehydrate\” preset on their air fryer. Quick answer: a dedicated dehydrator dries food more evenly, in far larger batches, at lower temperatures that preserve nutrients; an air fryer\’s dehydrate function works fine for small, occasional batches. Frequent dehydrators need the real thing; curious dabblers can start with the air fryer.
Dehydrating turns garden surplus into shelf-stable snacks: apple chips, jerky, dried herbs, fruit leather. This guide compares drying quality, capacity, energy, and cost, with 2026 buying tips.
How Each Dries Food
A food dehydrator, like the Cosori Premium or Excalibur 9-Tray , circulates low, steady heat (95–165°F) with a fan for hours, slowly evaporating moisture while enzymes and nutrients largely survive. Trays stack vertically or slide horizontally, offering huge surface area in a small footprint.
An air fryer\’s dehydrate mode runs its fan at the lowest temperature setting (usually 120–180°F minimum) for extended times. It works on the same principle but with critical limits: higher minimum temperatures, much smaller capacity, and less even airflow designed for crisping rather than slow drying.
Head-to-Head Comparison
| Category | Food Dehydrator | Air Fryer (Dehydrate Mode) |
|---|---|---|
| Drying evenness | Excellent — designed for it | Fair — hot spots, rotate trays |
| Capacity | Large — 6–12 sq ft of trays | Small — 1–2 sq ft |
| Min temperature | 95°F — safe for herbs, probiotics | 120–180°F — too hot for delicate items |
| Jerky quality | Excellent — even, safe drying | Good in small batches |
| Fruit leather & herbs | Excellent | Okay — herbs can scorch |
| Batch time | 6–12 hours unattended | 4–8 hours, needs monitoring |
| Energy per batch | Low wattage, long time | Higher wattage, shorter time |
| Noise | Gentle fan hum | Louder fan |
| Average price 2026 | $60–$300 | $0 extra (already owned) |
Drying quality: dehydrator wins clearly
Low, steady heat is the whole game in dehydrating. A dehydrator\’s 95°F minimum preserves delicate herbs\’ volatile oils and keeps fruit colors vibrant; an air fryer\’s 150°F-plus minimum can scorch herbs and case-harden fruit (dry outside, moist inside, which invites spoilage). Evenness matters too: dehydrators are engineered for uniform airflow across trays, while air fryers create hot spots that demand tray rotation.
Capacity: dehydrator wins overwhelmingly
A 9-tray dehydrator offers around 10–15 square feet of drying space; an air fryer offers one or two. Dehydrating is inherently a bulk activity: a bushel of apples, a garden\’s herb harvest, or a big jerky batch. Running an air fryer through six consecutive small batches to equal one dehydrator load is tedious and inefficient. If you dehydrate seasonally, capacity alone justifies the dedicated machine.
- Choose the dehydrator for: jerky regularly, garden surplus, herbs, fruit leather, large batches.
- Use the air fryer for: trying dehydrating once, small snack batches, apple chips experiments.
- Temperature rule: herbs want 95–115°F; fruits 125–135°F; jerky 145–165°F with proper food-safety handling.
Food safety for jerky
Jerky demands care: meat must reach 160°F internally to kill pathogens, either via pre-heating or a dehydrator that reaches safe temperatures. Most dehydrators top out at 155–165°F, adequate with proper technique (many guides recommend heating meat to 160°F in the oven first). Air fryers easily reach safe temperatures but their uneven drying needs monitoring. When in doubt, follow USDA jerky guidelines precisely.
Energy and noise
Dehydrators sip 300–600 watts over long hours; air fryers draw 1,400–1,800 watts for shorter runs. Total energy per pound of dried food is comparable, with the dehydrator slightly ahead for big batches. Noise favors the dehydrator: a gentle hum versus the air fryer\’s assertive fan. Neither is silent, but the dehydrator is easier to live with overnight.
The \”try before you buy\” case
Here is the air fryer\’s genuine value: it lets you discover whether you enjoy dehydrating before spending $150 on a dedicated machine. Make apple chips, dried mango, and a small jerky batch in the air fryer. If you find yourself wanting bigger batches and better results, you have your answer and the hobby to justify it.
Which Should You Buy? Buying Tips for 2026
- Buy the dehydrator if you dehydrate monthly or seasonally. Choose horizontal airflow (Excalibur-style) for the most even drying without tray rotation; vertical stack models are cheaper and fine for beginners. Stainless steel trays outlast plastic.
- Use your air fryer first if you are curious but uncommitted. Test with apple chips and herbs; upgrade when batch size frustrates you.
- Check temperature range: a 95°F minimum matters for herbs and yogurt; 165°F maximum covers jerky safety.
- Timer with auto-shutoff is essential for overnight runs; 24–48 hour timers suit the longest projects.
- Store dried foods properly: condition dried fruit in jars for a week, then store airtight with oxygen absorbers for months of shelf life.
2026 Trends in Dehydrating
Dehydrators are getting smarter: digital controls with precise temperature steps, glass doors for monitoring, and quieter fans are now mid-range features. Stainless steel construction is trending as buyers reject plastic trays. Combination appliances (dehydrator-oven hybrids) are emerging for those who want one machine for baking and drying.
The homemade-snack movement, driven by clean-label eating and garden growing, keeps dehydrating popular. Expect more recipe content around pet treats, backpacking meals, and zero-waste preservation.
Dehydrating Mistakes That Spoil Batches
Dehydrating is forgiving, but these errors waste hours and harvests. Learn them before your first big batch.
Mistake 1: Slicing unevenly. Thick and thin pieces in the same batch mean some pieces scorch while others stay moist enough to mold. A mandoline slicer set to uniform thickness (1/8–1/4 inch for most fruits) is the dehydrator\’s best friend. Consistency matters more than thinness.
Mistake 2: Overcrowding trays. Overlapping pieces block airflow, creating moist pockets that never dry and invite spoilage. Arrange in a single layer with space between pieces, even if it means running two batches. Airflow is the entire mechanism; respect it.
Mistake 3: Drying at too high a temperature. Cranking heat to finish faster case-hardens food: dry exterior sealing moisture inside, which later breeds mold in storage. Follow recommended temperatures (125–135°F for fruits, 145–155°F for jerky) and let time do the work. Dehydrating rewards patience, not haste.
Mistake 4: Skipping the conditioning step. Freshly dried fruit has uneven residual moisture between pieces. Conditioning, resting dried food in a sealed jar for a week with daily shaking, equalizes moisture and reveals any pieces needing more drying. Skipping it risks moldy surprises months later.
Mistake 5: Storing in non-airtight containers. Dried food reabsorbs ambient moisture eagerly, turning crisp chips leathery and inviting spoilage. Store in truly airtight jars or vacuum-sealed bags with oxygen absorbers, away from light. Proper storage is what makes the other eleven months of shelf life possible.
Best Beginner Projects for Each Machine
Start with apple chips: Slice uniformly, optionally dip in lemon water to prevent browning, and dry at 135°F until crisp. They are nearly foolproof, delicious, and teach slicing and timing fundamentals. Both machines handle this project well, making it the perfect air-fryer trial before committing to a dehydrator.
Graduate to herbs: Basil, oregano, thyme, and mint dry beautifully at 95–115°F, temperatures only a dedicated dehydrator reaches safely. Home-dried herbs crush store-bought in aroma and make the dehydrator\’s low-temperature advantage tangible. This is the project that converts air-fryer dabblers into dehydrator owners.
Advance to jerky: Marinated beef or turkey sliced 1/4-inch thick, dried at 145–155°F with food-safety diligence. Jerky demands the dehydrator\’s capacity and evenness; air fryer batches are too small to justify the prep. Homemade jerky costs a fraction of commercial and tastes profoundly better.
Explore fruit leather: Pureed fruit spread thin on lined trays, dried until pliable. Kids love it, it uses up overripe fruit brilliantly, and it showcases the dehydrator\’s large flat trays. Air fryers struggle here due to limited flat space.
Storing and Using Your Dried Foods
Drying is only half the craft; storage determines whether your work lasts months or molds in weeks.
Conditioning first: After drying, place cooled food loosely in glass jars, filling about two-thirds full, and seal. For 7–10 days, shake daily and watch for condensation. Any moisture on the jar walls means pieces need more drying time; return the batch to the dehydrator. This step equalizes moisture between pieces and is the professional\’s secret to long storage.
Long-term storage: Once conditioned, pack in airtight containers, vacuum-sealed bags, or mason jars with oxygen absorbers. Store in a cool, dark place; light and warmth degrade quality steadily. Properly dried fruits keep 6–12 months, vegetables 6–12 months, herbs 6–12 months (though potency fades), and jerky 1–2 months at room temperature or 6 months refrigerated.
Using dried foods: Rehydrate vegetables in hot water for 20–30 minutes before adding to soups and stews; they plump remarkably. Dried fruits shine in baking, trail mixes, and compotes. Powder dried mushrooms, tomatoes, or chiles in a spice grinder for instant umami bombs that elevate any dish. Dried herbs crumble directly into cooking, using about one-third the amount of fresh.
Signs of spoilage: Any mold, off-odors, or unexpected moisture means discard the entire container, not just the visibly affected pieces. When in doubt, throw it out; the food-safety stakes are not worth the savings. Properly dried and stored food rarely spoils, which is exactly why the conditioning and storage steps matter.
Dehydrating for Special Diets and Lifestyles
Backpacking and hiking: Dehydrated meals are the backbone of lightweight backcountry eating: dried vegetables, instant rice, and jerky combine into trail meals at a fraction of commercial freeze-dried prices. Dry components separately, assemble meal bags, and rehydrate with boiling water at camp. A dehydrator pays for itself in one hiking season for regular backpackers.
Baby and toddler food: Dried fruit and vegetable powders blend into purees and oatmeal, adding nutrition without preservatives. Apple, sweet potato, and carrot powders are perennial favorites. The control over ingredients is the entire appeal for health-conscious parents.
Pet treats: Single-ingredient dried sweet potato, chicken breast, and liver treats cost a fraction of commercial equivalents with zero mystery ingredients. Slice uniformly, dry thoroughly, and store airtight. Dogs go absolutely wild for homemade jerky treats.
Zero-waste kitchens: Dehydrating rescues produce that would otherwise spoil: overripe fruit becomes leather, wilting herbs become dried seasoning, surplus garden harvests become winter stores. It is among the most practical food-waste tools a kitchen can own.
Frequently Asked Questions
Can an air fryer really dehydrate food?
Yes, for small batches. Use the dehydrate preset or the lowest temperature setting, slice food thinly and evenly, arrange in a single layer, and expect 4–8 hours with occasional tray rotation. Results are good for snacks like apple chips, though less even than a dedicated dehydrator.
What temperature do you dehydrate jerky at?
Dehydrate jerky at 145–155°F after ensuring the meat reaches 160°F internally for food safety (pre-heat in the oven or use a validated method). Slice meat 1/4-inch thick against the grain, marinate for flavor and safety, and dry until it cracks but does not snap.
How long does dehydrated food last?
Properly dried and stored foods last 6–12 months: fruits 6–12 months, vegetables 6–12 months, jerky 1–2 months at room temperature (longer refrigerated). Store in airtight containers away from light and moisture; any sign of moisture or off-odors means discard.
Do I need to blanch vegetables before dehydrating?
Blanching (brief boiling then ice bath) preserves color, texture, and nutrients in most vegetables and is recommended for green beans, carrots, and broccoli. Fruits generally do not need blanching; a lemon-juice dip prevents browning in apples and bananas.
Why is my dehydrated fruit sticky?
Stickiness means under-drying: moisture remains trapped inside. Dry longer at the correct temperature and ensure pieces are uniformly thin. Properly dried fruit should feel leathery and pliable with no moisture pockets; condition it in a jar for a week to equalize any remaining moisture.
Is dehydrating cheaper than buying dried snacks?
Usually yes, significantly. Commercial dried mango, jerky, and apple chips carry heavy markups; homemade versions cost a fraction, especially from garden or bulk produce. The dehydrator pays for itself quickly for regular snackers, and you control ingredients completely.
The Bottom Line
In the dehydrator vs air fryer matchup, the dedicated dehydrator is the better drying machine in every technical respect: lower temperatures, even airflow, and far greater capacity. The air fryer\’s dehydrate function is a genuinely useful trial run and adequate for small, occasional batches. Start with the air fryer to test your interest; buy the dehydrator when your apple-chip ambitions outgrow the basket.
