
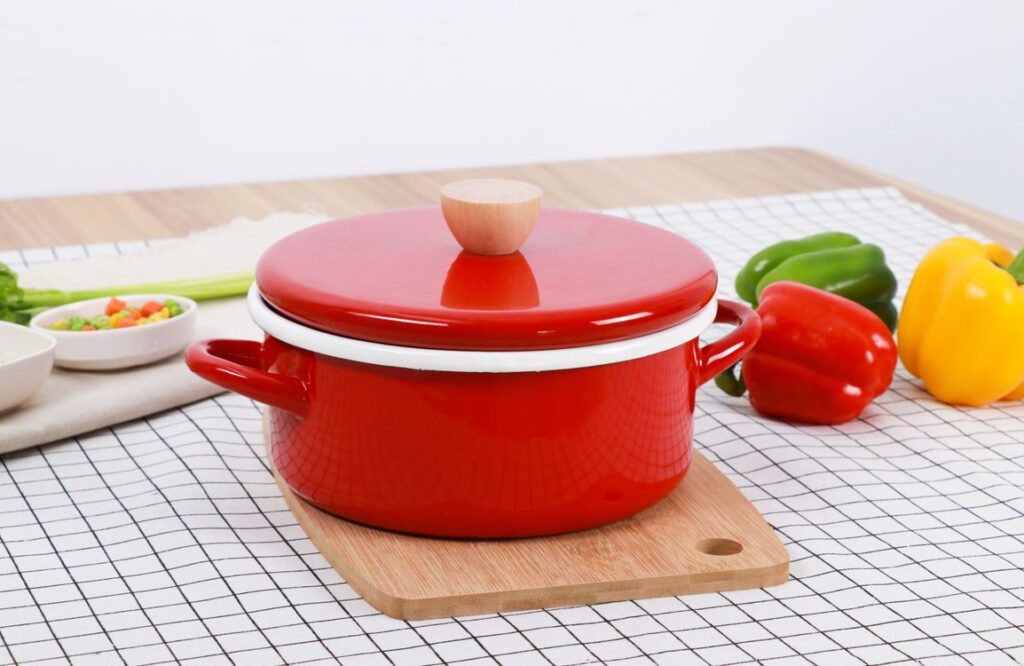
To master how to braise meat in a Dutch oven, sear seasoned meat in hot oil until deeply browned on all sides, add aromatics and enough flavorful liquid to come one-third to halfway up the meat, cover with the lid, and cook low and slow at 300 to 325°F (150 to 165°C) until fork-tender, usually 2.5 to 4 hours depending on the cut.
Braising is the combination cooking method behind pot roast, beef bourguignon, carnitas, and osso buco: dry-heat searing for flavor followed by moist-heat simmering for tenderness. A Dutch oven is the ideal vessel because its heavy walls and tight lid hold steady, even heat and trap moisture. This guide explains how to braise meat in a Dutch oven step by step, which cuts to choose, how much liquid to use, and how to finish with a silky sauce.
Why Braising Works: Tough Cuts Become Tender
Braising targets cuts rich in connective tissue, primarily collagen. These cuts, like chuck roast, short ribs, and shanks, are chewy when cooked quickly because the collagen remains tough and rubbery. But held between 160 and 200°F (71 to 93°C) for hours in moist heat, collagen slowly unwinds and converts to gelatin, which coats the meat fibers in luscious richness. The meat does not just soften; it transforms.
This is why lean, tender cuts should never be braised. A filet mignon or chicken breast has little collagen to convert, so long moist cooking just squeezes out its moisture and turns it dry and stringy. Braising is specifically the technique for turning the cheapest, toughest cuts into the most succulent dishes, which makes it one of the most economical skills in cooking.
The Dutch oven\’s design serves braising perfectly. Heavy cast iron, often enameled, distributes heat evenly without hot spots that scorch. The tight-fitting lid recirculates evaporating moisture, creating a self-basting environment, while the vessel moves seamlessly from stovetop searing to oven braising in one pot.
Best Cuts of Meat for Braising
- Beef chuck roast: the classic braising cut, with ideal fat and collagen. Becomes spoon-tender in 3 to 4 hours.
- Short ribs: luxurious marbling and bone-in flavor; the bones enrich the braising liquid into a natural sauce.
- Beef shank and oxtail: extremely collagen-rich, producing deeply gelatinous, sticky sauces.
- Pork shoulder (Boston butt): the go-to for carnitas and pulled pork; forgiving and flavorful.
- Lamb shanks: elegant and rich, braise beautifully in wine with rosemary and garlic.
- Chicken thighs and legs: braise faster than red meat, 45 to 75 minutes, and stay juicy thanks to dark-meat fat.
Look for cuts labeled chuck, shoulder, shank, ribs, or belly. Bone-in cuts generally produce better braises because bones contribute gelatin and flavor to the liquid. Cut large roasts into 2 to 3-inch chunks for faster, more even cooking, or braise whole for a dramatic presentation that shreds at the table.
How to Braise Meat in a Dutch Oven: The 6 Steps
Step 1: Season and Sear for Deep Browning
Pat the meat dry and season generously with salt and pepper. Heat a thin film of oil in the Dutch oven over medium-high heat until shimmering. Sear the meat in batches, without crowding, until deeply browned on all sides, 3 to 5 minutes per side. This Maillard browning builds the flavor foundation of the entire dish. Do not rush or skip this step; pale meat makes pale, flat-tasting braises. Transfer browned meat to a plate.
Step 2: Build the Aromatic Base
In the same pot, sauté diced onion, carrot, and celery until softened and lightly caramelized, 6 to 8 minutes. Add garlic, tomato paste, and spices for the final minute or two. The browned bits stuck to the pot, the fond, dissolve into the aromatics and become part of the sauce. This layered base is what separates a rich braise from boiled meat.
Step 3: Deglaze With Wine or Stock
Pour in about a cup of red wine, white wine, beer, or stock and scrape the pot bottom thoroughly with a wooden spoon. Let it simmer 2 to 3 minutes to cook off the harsh alcohol edge. Deglazing captures every bit of caramelized flavor from searing and builds it into the braising liquid.
Step 4: Add Liquid to the Right Level
Return the meat to the pot and add enough stock, or a stock-and-wine combination, to come one-third to halfway up the sides of the meat, not to submerge it. This is the most common braising mistake: too much liquid boils the meat instead of braising it. The exposed top browns gently in the oven\’s heat while the submerged portion simmers, and the tight lid keeps everything moist. Add herbs like bay leaf, thyme, and rosemary now.
Step 5: Cover and Cook Low and Slow
Cover with the lid and transfer to a 300 to 325°F (150 to 165°C) oven. The oven\’s surround heat is gentler and more even than a stovetop burner, which is why oven braising beats stovetop braising for consistency. Cook until fork-tender: the meat should yield easily when prodded and nearly fall apart. Turn the meat once or twice during cooking for even exposure.
Step 6: Rest, Defat, and Finish the Sauce
Transfer the meat to a platter and tent loosely. Strain the braising liquid, let the fat rise, and skim it off or use a fat separator. Simmer the defatted liquid on the stovetop to reduce and concentrate it into a glossy sauce, thickening with a cornstarch slurry or beurre manié if needed. Spoon over the meat and serve.
Braising Time and Temperature Chart
| Cut | Oven Temp | Time | Done When |
|---|---|---|---|
| Beef chuck roast (3–4 lbs) | 325°F / 165°C | 3–4 hours | Shreds with a fork |
| Short ribs | 325°F / 165°C | 2.5–3.5 hours | Meat pulls from bone |
| Pork shoulder (4–5 lbs) | 300°F / 150°C | 4–5 hours | Falls apart easily |
| Lamb shanks | 325°F / 165°C | 2–2.5 hours | Meat loosens on bone |
| Chicken thighs (bone-in) | 325°F / 165°C | 45–75 min | 165°F internal, tender |
| Oxtail | 325°F / 165°C | 3–3.5 hours | Silky, gelatinous |
Common Braising Mistakes to Avoid
- Skipping the sear. Browning is where the deep flavor comes from. Gray, unseared meat produces a braise that tastes boiled.
- Too much liquid. Submerging the meat turns braising into boiling. Keep liquid at one-third to halfway up the meat.
- Heat too high. A hard boil toughens meat even in liquid. Keep the oven at 300 to 325°F and the liquid at a gentle burble.
- Lifting the lid constantly. Every peek releases heat and moisture. Trust the timer and check once midway.
- Undercooking. If the meat is still tough, it needs more time, not higher heat. Collagen conversion cannot be rushed.
- Serving the fat. Always defat the braising liquid before reducing; a greasy sauce ruins the dish.
- Salting only at the start. Season the meat before searing, but adjust the final sauce\’s salt after reduction, since reducing concentrates saltiness.
Finishing Touches: From Pot to Plate
Rest the meat 15 to 20 minutes before serving so the fibers relax and reabsorb juices. For an elegant finish, strain the reduced sauce through a fine-mesh sieve for silkiness and whisk in a tablespoon of cold butter off the heat for shine and body, a technique called monter au beurre. Brighten the rich dish with something acidic or fresh: gremolata on osso buco, pickled onions on carnitas, or a squeeze of lemon over braised chicken.
Braised dishes improve overnight as flavors meld, making them ideal for entertaining. Cool the whole pot, refrigerate, and reheat gently the next day, the fat will have solidified on top for easy removal, a bonus for sauce clarity.
Braising Liquids: Wine, Beer, Stock, and Beyond
The braising liquid becomes your sauce, so choose it with care. Dry red wine like Côtes du Rhône or Chianti adds acidity, fruit, and depth to beef braises; use a wine you would drink, since off flavors concentrate. White wine or dry vermouth suits chicken, veal, and pork, keeping the sauce lighter in color and flavor.
Beer brings malt sweetness and bitterness: dark stouts and porters enrich beef and short ribs, while Belgian ales complement pork beautifully. Stock, ideally homemade, is the most versatile base and lets the meat\’s flavor dominate. Many great braises combine liquids, such as wine plus stock, for layered complexity.
Beyond the classics, consider cider for pork with apples, coconut milk with curry spices for Southeast Asian-style braises, tomatoes (canned or fresh) for Italian sugo-style braises, and soy sauce with aromatics for Chinese red-cooking. Whatever you choose, remember the liquid reduces and concentrates, so avoid anything very salty or very sweet at the start; you can adjust at the end.
Make-Ahead and Freezing Braised Meat
Braised meat is one of the best make-ahead dishes in cooking. Flavors meld and deepen overnight, and the texture often improves as the meat rests in its liquid. To make ahead, cool the pot relatively quickly, refrigerate the meat in its braising liquid, and reheat gently on the stovetop or in a 325°F oven the next day. The chilled fat solidifies on the surface for effortless removal, which actually improves the sauce.
For freezing, portion the meat with enough braising liquid to cover into airtight containers or freezer bags, leaving headspace for expansion. Freeze for up to 3 months. Thaw overnight in the refrigerator and reheat gently; rapid boiling during reheating can toughen the meat, so keep it at a bare simmer. Reduce the sauce after reheating if it thins out during storage.
Frequently Asked Questions
What temperature should I braise meat at?
Braise in a 300 to 325°F (150 to 165°C) oven. This keeps the braising liquid at a gentle simmer around 180 to 200°F, the ideal range for converting collagen to gelatin without boiling the meat tough. Lower than 300°F works but extends cooking time; higher than 325°F risks aggressive bubbling and dry, stringy meat.
How much liquid do you need to braise meat?
Add enough flavorful liquid to come one-third to halfway up the sides of the meat, never to submerge it fully. The meat\’s exposed top browns in the oven heat while the lower portion simmers, and the Dutch oven\’s tight lid recirculates moisture. Too much liquid boils the meat and dilutes flavor.
Can you overcook braised meat?
Yes, though braising is forgiving. Past the point of tenderness, meat fibers break down completely and turn mushy and dry as they can no longer hold moisture. The window is wide, often an hour or more, but check for doneness with a fork rather than cooking indefinitely. Once it shreds easily, it is done.
Should I braise on the stovetop or in the oven?
The oven is better for most braises. Its surround heat cooks evenly from all sides, while a stovetop burner heats only from below and can scorch the bottom even at low settings. Use the stovetop for searing and building the base, then move the covered Dutch oven into the oven for the long, gentle braise.
Do I need to brown meat before braising?
Browning is strongly recommended though not strictly required for food safety. Searing triggers the Maillard reaction, creating deep roasted flavors that hours of simmering alone cannot produce. Unseared braises taste noticeably flatter and paler. The few minutes of searing pay off enormously in the final dish.
Why is my braised meat still tough?
Tough braised meat is almost always undercooked, not overcooked. Collagen needs sustained time in the 160 to 200°F range to convert to gelatin. If a fork does not slide in easily, return the covered pot to the oven for another 30 to 60 minutes and check again. Raising the heat will not help; only time finishes the conversion.
Can I braise vegetables in a Dutch oven too?
Absolutely. Hardy vegetables like carrots, parsnips, fennel, and cabbage braise beautifully in the same way: sear or caramelize first, add a modest amount of flavorful liquid, cover, and cook until tender. They need far less time than meat, typically 30 to 60 minutes, and absorb the braising flavors wonderfully. A mix of braised root vegetables makes an excellent vegetarian main course on its own.
