
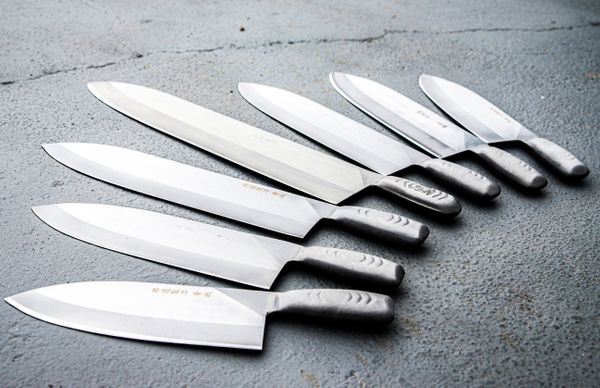
Learning how to fillet a whole fish at home is a skill that pays for itself: with a sharp, flexible fillet knife, you cut behind the gills down to the backbone, then slice along the bones from head to tail in long smooth strokes, letting the knife do the work. Flip the fish and repeat, then remove pin bones with tweezers and skin the fillets if desired. The whole process takes under 10 minutes with practice.
Buying whole fish is significantly cheaper per pound than buying fillets, and whole fish is fresher, easier to judge for quality, and yields bones and heads for superb stock. Yet many home cooks avoid it from intimidation. This guide explains how to fillet a whole fish at home step by step, focusing on round fish like sea bass, snapper, and trout, with knife guidance, safety tips, and how to use every part.
The Right Knife and Setup
A fillet knife, thin, flexible, and 6 to 9 inches long, is the correct tool. Its flexibility lets the blade ride along the curved rib cage, maximizing meat yield, while its thinness slips between flesh and bone cleanly. A stiff chef\’s knife can work in a pinch but wastes meat and tears the flesh. Keep the fillet knife razor sharp; a dull fillet knife is the main cause of mangled fish and cut fingers.
Set up a large cutting board that will not slip (place a damp towel underneath) with room to maneuver the whole fish. Have a bowl for scraps, fish tweezers or clean needle-nose pliers for pin bones, and paper towels for grip; fish is slippery, and drying the surface improves control enormously. Work with the fish cold from the refrigerator; cold flesh is firmer and slices more cleanly than room-temperature fish.
Choosing and Preparing the Fish
Buy whole fish with clear, bulging eyes, bright red or pink gills, firm flesh that springs back when pressed, and a fresh ocean smell, never fishy or ammonia-like. The fish should ideally be scaled and gutted by the fishmonger; ask them to do it, as most will happily oblige. If you must scale it yourself, scrape a fish scaler or the back of a knife from tail to head under running water.
Rinse the fish inside and out under cold water and pat completely dry. Drying matters for grip and for clean cuts. Lay the fish on its side with the head pointing away from your knife hand (to the left for right-handed cooks), dorsal fin up. Take a moment to feel the anatomy through the flesh: the backbone runs center, ribs curve down each side, and the fillet is the meat between skin and bones.
How to Fillet a Whole Fish at Home: The 8 Steps
Step 1: Cut Behind the Gills
Place the knife just behind the gill plate and pectoral fin, angled slightly toward the head. Cut down through the flesh until you feel the backbone, but do not cut through it. This cut frees the head end of the fillet and gives you an entry point for the long backbone cut.
Step 2: Open the Belly Cut
Turn the knife and make a shallow cut along the belly from the gill cut back toward the tail, just through the skin and the thin belly flesh. This defines the fillet\’s lower edge and prevents tearing when you lift the fillet later. Keep the cut shallow; the belly meat is thin.
Step 3: Slice Along the Backbone
Insert the knife into the gill cut with the blade flat against the backbone. Using long, smooth strokes, slice from head to tail, keeping the blade pressed lightly against the bones so you feel them guiding the knife. Let the knife\’s sharpness do the work; sawing or forcing tears the flesh. The fillet should begin peeling away as you progress.
Step 4: Free the Fillet
As you reach the tail, cut through to free the fillet completely, leaving the tail fin attached to the carcass. Lift the fillet away and lay it skin-side down. Admire your work: one clean fillet with minimal flesh left on the bones.
Step 5: Flip and Repeat
Turn the fish over so the other side faces up and repeat steps 1 through 4. The second side often goes faster because you have the rhythm. You now have two fillets and a carcass of head, bones, and tail.
Step 6: Remove the Pin Bones
Run your fingertip along the center line of each fillet; you will feel a row of tiny pin bones. Grip each with fish tweezers and pull firmly in the direction the bone points, toward the head end, not straight up, which tears the flesh. Pin bones pull cleanest when the fillet is cold.
Step 7: Skin the Fillets (Optional)
To skin, lay the fillet skin-side down and grip the tail end firmly (a paper towel helps). Angle the knife nearly flat, cut into the flesh just above the skin at the tail, then push the knife forward in a smooth sawing motion while holding the skin taut. The skin should separate in one clean sheet. Many preparations, like crispy-skin salmon, keep the skin on; remove it for delicate poaching or baking.
Step 8: Portion and Store
Trim any ragged edges and portion into serving sizes. Use fillets within 1 to 2 days, stored on ice or in the coldest part of the refrigerator, or freeze immediately: wrap tightly in plastic, then foil or a freezer bag, removing as much air as possible. Properly wrapped fish freezes well for 3 months.
Round Fish vs. Flat Fish: Key Differences
| Feature | Round Fish (bass, snapper, trout) | Flat Fish (sole, flounder, plaice) |
|---|---|---|
| Yield | 2 fillets | 4 fillets (2 per side) |
| First cut | Behind gills to backbone | Down the center lateral line |
| Bone structure | Central backbone + ribs | Central backbone, flatter |
| Difficulty | Beginner-friendly | Slightly more technique |
| Examples | Sea bass, snapper, trout, mackerel | Sole, flounder, dab, plaice |
Start with round fish; the anatomy is intuitive and the technique transfers directly. Flat fish filleting follows the same principles but works outward from the center line on each side, producing four thinner fillets. The guide above covers round fish, which handles the vast majority of home cooking needs.
Using the Whole Fish: Bones, Head, and Collars
Do not discard the carcass. Fish heads, bones, and tails make fish stock (fumet) in just 20 to 30 minutes, far faster than meat stocks, producing a delicate base for soups, risottos, and sauces. Simmer gently with onion, celery, bay, and peppercorns; never boil hard or cook longer than 30 minutes, which turns fish stock bitter.
Fish collars, the fatty triangular cut behind the gills, are a delicacy in Japanese cooking (hamachi kama): broil or grill with salt until crisp and rich. Cheeks, on larger fish, are the sweetest morsels of all. Using the whole fish honors the animal, saves money, and delivers flavors fillets alone cannot.
Safety Tips for Filleting
- Sharp knife, always. A sharp blade needs little force and goes where you aim it; a dull blade slips. Hone before each session.
- Cut away from your body and keep your guiding hand\’s fingers curled, behind the blade\’s path.
- Dry hands and fish. Slipperiness causes most filleting accidents. Paper-towel the fish and wipe your hands often.
- Respect spiny fins. Dorsal spines on fish like snapper can puncture skin. Handle with awareness or snip them off with shears first.
- Stable board. A sliding board under a sharp knife is dangerous. Damp towel underneath, always.
Buying Whole Fish: What to Ask Your Fishmonger
A good fishmonger is the home cook\’s greatest ally. Ask when the fish came in, where it is from, and whether it was previously frozen; honest answers signal a trustworthy counter. Previously frozen fish is perfectly good, often better than \”fresh\” fish that has sat for days, but you deserve to know. Ask them to scale and gut the fish, which most do free of charge and which saves you the messiest steps.
For filleting practice, start with trout or sea bass: modest size, straightforward anatomy, and forgiving flesh. Mackerel is inexpensive and excellent for practice, though its soft flesh demands a very sharp knife. Save large, expensive fish like whole salmon or halibut for after you have filleted five or six smaller fish confidently.
Build the relationship. Regulars get the honest advice: which fish is at peak season, what just came in, and how to handle unfamiliar species. A fishmonger who knows you cook whole fish will often set aside collars, heads for stock, or recommend the catch of the day. That relationship is worth more than any knife.
Frequently Asked Questions
What is the best knife for filleting fish?
A dedicated fillet knife, 6 to 9 inches long with a thin, flexible blade, is the best tool. The flexibility follows the fish\’s rib cage for maximum yield and clean separation. Keep it very sharp; flexible blades dull faster than thick ones. A stiff boning knife is the second-best option if you do not own a fillet knife.
Should I scale fish before filleting?
Scales do not affect the filleting cuts themselves, but they make handling messy and can end up in your workspace. Most fishmongers scale and gut on request, which is the easiest path. If you buy truly whole fish, scrape scales off under running water before you start, working tail to head.
How do you remove pin bones from fish fillets?
Run a finger along the fillet\’s center line to locate the row of small bones, then pull each one with fish tweezers in the direction it points (toward the head end), not straight up. Work while the fillet is cold and firm. Clean needle-nose pliers work in place of dedicated fish tweezers.
Is it cheaper to buy whole fish or fillets?
Whole fish typically costs 30 to 50 percent less per pound of edible meat than pre-cut fillets, and you gain the bones and head for free stock. The trade-off is your time and a small learning curve. Once filleting takes under 10 minutes, whole fish is the clear economic winner for anyone who cooks fish regularly.
Can you fillet a fish without a fillet knife?
Yes, with a very sharp chef\’s knife, though the stiff blade cannot follow the rib cage as closely, so you will leave more meat on the bones and risk tearing the fillet. For occasional filleting it suffices. If you fillet fish more than a few times a year, a proper fillet knife is a worthwhile, inexpensive investment.
How fresh should fish be for filleting?
Fillet as fresh as possible, ideally the day of purchase. Look for clear bulging eyes, red gills, firm springy flesh, and a clean ocean smell. Cold, firm flesh slices far more cleanly than fish that has warmed up, so keep it refrigerated until the moment you start and work efficiently.
What do I do with fish bones and heads?
Make fish stock: simmer bones, heads, and tails gently with aromatic vegetables for 20 to 30 minutes, never longer, then strain. It becomes the base for chowders, bouillabaisse, risotto, and pan sauces. Freeze the stock in portions. Never boil fish stock hard or cook it past 30 minutes, which extracts bitterness.
What is the best fish for beginners to fillet?
Start with small round fish like trout, sea bass, or mackerel. Their anatomy is straightforward, the bones are easy to feel, and mistakes cost little. Practice on five or six small fish before attempting large salmon or flatfish. Inexpensive mackerel from a fish market is the ideal practice fish: delicious when cooked well, cheap enough to forgive errors.
How do you fillet a flatfish like sole?
Flatfish yield four fillets instead of two. Make a cut down the center lateral line from head to tail, then slice outward from the center toward the edges on each side, keeping the blade against the flat bones. Flip and repeat. The technique uses the same long smooth strokes as round fish, just working outward from the middle rather than along a backbone.
