
Small kitchens do not have a space problem — they have a layout problem. The same six appliances that create chaos on one countertop work beautifully in another kitchen of identical size, purely because of where they live and how the workflow flows. These small kitchen appliance layout tips for 2026 are about making every square inch earn its keep, so a compact kitchen cooks like a big one.
The stakes are practical, not aesthetic. Poor appliance layout means hauling the stand mixer across the kitchen, the air fryer blocking the prep zone, and the coffee maker stranded far from water. Good layout means everything you need is within a step or two, counters stay clear for actual cooking, and the kitchen feels calm instead of crowded — even at 60 square feet.
This guide covers twelve layout tips: zoning your kitchen by task, the counter-versus-cabinet decision framework, vertical storage strategies, appliance garages and lift shelves, the work triangle for small spaces, power outlet planning, multi-functional consolidation, staging daily rituals, managing heat and steam, and layouts for galley, L-shape, and one-wall kitchens.
Small Kitchen Appliance Layout Tips at a Glance
The core principles: zone by task (coffee station, cooking zone, prep zone), keep daily-use appliances on the counter and everything else stored, exploit vertical space ruthlessly, consolidate single-taskers into multi-cookers where possible, and protect your primary prep counter above all else. Every tip below serves one goal — a small kitchen where cooking feels effortless, not cramped.
Tip 1: Zone Your Kitchen by Task
Professional kitchens run on stations, and small home kitchens should too. Create three zones: a beverage station (kettle, coffee maker) near the water source and mugs; a cooking zone around the stove with the air fryer, multi-cooker, and most-used utensils; and a prep zone — the largest clear counter — with the knife block and cutting board. Each zone holds only its task\’s tools.
Zoning prevents the classic small-kitchen failure: every appliance migrating to wherever there is space, creating a scattered obstacle course. When the coffee maker lives at the coffee station permanently, mornings flow; when it drifts, mornings involve hunting. Assign homes and keep them.
Tip 2: The Counter-vs-Cabinet Decision Rule
Counter space is the scarcest resource — allocate it ruthlessly. The rule: an appliance earns permanent counter space only if used at least 4–5 times weekly. Daily coffee maker? Counter. Weekly stand mixer? Cabinet. Monthly waffle maker? High shelf or pantry.
Be honest about frequency, not aspiration. The bread maker you used twice lives in storage; the air fryer you use nightly owns its corner. Re-audit quarterly — habits change, and the layout should follow. This single discipline frees more counter space than any organizer product.
Tip 3: Exploit Vertical Space Relentlessly
Small kitchens waste their walls. Mount the microwave under a cabinet or on a shelf bracket to reclaim two square feet of counter. Install a rail system (IKEA KUNGSFORS-style) for hanging utensils, small shelves for spices, and hooks for mugs. Use the sides of cabinets and the refrigerator for magnetic storage.
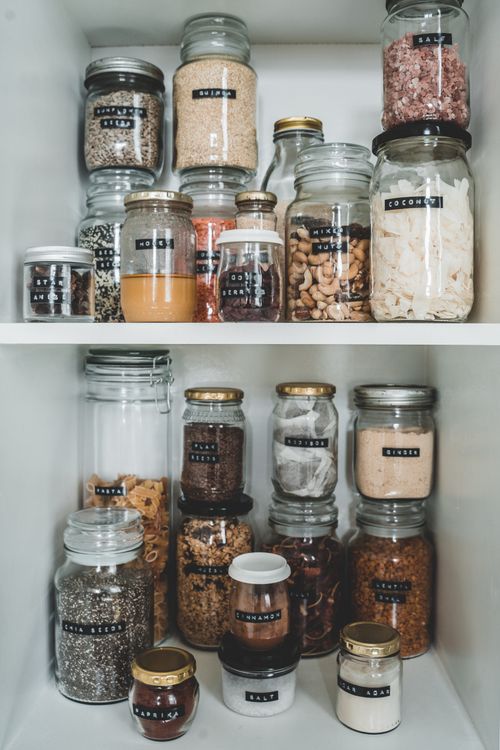
Inside cabinets, vertical wins too: shelf risers double stacking space, door-mounted racks hold wraps and spices, and pull-out drawers convert deep cabinets from black holes into accessible storage. Every vertical inch exploited is a horizontal inch saved for prep.
Tip 4: Consider an Appliance Garage or Lift Shelf
Appliance garages — countertop cabinets with roll-up or lift doors — hide small appliances while keeping them plugged in and accessible. A lift shelf (mixer lift) in a base cabinet raises heavy stand mixers to counter height mechanically, eliminating the hauling problem that keeps mixers unused.
These are renovation-level additions, but even renters can approximate the effect: a large cabinet or pantry shelf designated as the appliance station, with a power strip inside, keeps machines accessible yet invisible. The goal is zero-friction access without permanent counter occupation.
Tip 5: Protect the Prep Zone Above All
The most important \”appliance\” in a small kitchen is clear counter space — and it needs defending. Designate your largest continuous counter stretch (ideally 24+ inches beside the stove or sink) as the sacrosanct prep zone: no appliances live there permanently, no mail accumulates, no dish rack colonizes it.
Everything else in the layout serves this zone. Appliances cluster at the counter\’s ends or on secondary surfaces; the prep zone stays clear for cutting boards, mixing bowls, and sheet pans. A small kitchen with a protected prep zone cooks better than a large kitchen without one.
Tip 6: Plan Power Before Placing Appliances
Appliances need outlets where they work, not where outlets happen to be. Map your zones to outlet locations before finalizing placement — the coffee station needs two outlets (brewer plus grinder), the cooking zone needs accessible outlets for countertop cookers, and cords should never stretch across walkways or the prep zone.
Where outlets are scarce, a slim under-cabinet power strip adds capacity without clutter. Avoid daisy-chaining high-wattage appliances on one circuit — an air fryer plus microwave on the same 15-amp circuit will trip breakers. Know which outlets share circuits and distribute heavy loads accordingly.
Tip 7: Consolidate With Multi-Cookers
The fastest way to free counter space is replacing three single-taskers with one multi-cooker. A quality multi-cooker (pressure cook, air fry, slow cook, steam) can retire the standalone slow cooker, rice cooker, and steamer — reclaiming two square feet while losing little capability. Audit your appliances for functional overlap and consolidate ruthlessly.
Keep specialists only for daily rituals where quality differences matter: the espresso machine for the coffee-obsessed, the gooseneck kettle for pour-over devotees. Consolidate everything used weekly or less. The 2026 multi-cooker generation is good enough that consolidation rarely feels like compromise.
Tip 8: Stage Daily Rituals as Stations
Mornings and recurring tasks deserve permanent stations that eliminate setup friction. The coffee station — brewer, grinder, mugs, beans, all within arm\’s reach near water — turns a five-minute setup into a one-minute ritual. Similarly, a smoothie station (blender, frozen fruit access, protein) or tea station earns its footprint through daily use.
Stations work because they batch the small frictions (fetching, plugging, arranging) that otherwise discourage the habit. Give each station a tray or mat to define its territory visually — it keeps the station tidy and signals \”this space is claimed\” to other household members.
Tip 9: Manage Heat, Steam, and Clearances
Small kitchens concentrate heat and steam — plan for it. Air fryers and toaster ovens need 4–6 inches of clearance on sides and top; placing them under low cabinets without clearance risks heat damage. Position steam-producing appliances (kettles, multi-cookers at pressure release, steam ovens) away from upper cabinets to prevent moisture damage to cabinetry.
Ventilation matters more in small spaces: run the range hood for all stovetop cooking, and consider a compact air purifier for open-plan kitchens where cooking odors drift to living areas. A small kitchen\’s air quality degrades faster than a large one\’s — active management keeps it pleasant.
Tip 10: Adapt the Work Triangle to Small Spaces
The classic kitchen work triangle (sink–stove–fridge) compresses in small kitchens — and that is fine. What matters is minimizing steps between the points you travel most: fridge to prep, prep to stove, stove to sink. Arrange your most-used countertop appliances along these paths, not across them.
In galley kitchens, keep one side primarily clear for prep and movement, concentrating appliances on the other. In L-shapes, the corner is prime appliance real estate (deep but awkward for prep) — a lazy Susan or corner appliance station uses it well. In one-wall kitchens, vertical storage and a rolling cart for overflow become essential.
Tip 11: Use Mobile and Flexible Storage
A rolling kitchen cart is the small kitchen\’s secret weapon: extra prep surface, appliance storage, and serving station that tucks away when unneeded. Use it to stage the air fryer during cooking sessions, then roll it to a closet corner. Similarly, over-sink cutting boards and dish racks convert the sink into temporary counter space.
Fold-down tables and wall-mounted drop leaves create occasional dining or prep space without permanent footprint. The principle: in small kitchens, flexibility beats fixed capacity — surfaces and storage that appear when needed and vanish when not.
Tip 12: Light It Right — Layout Includes Visibility
The overlooked layout element: lighting. Small kitchens with poor lighting feel smaller and cook worse — you cannot prep safely in shadow. Under-cabinet LED strips ($20–$40) transform countertop visibility, making every zone more usable. Battery-operated puck lights work for renters.
Position task lighting over the prep zone and cooking zone specifically; ambient ceiling light alone creates shadows exactly where you work. Good lighting is the cheapest \”renovation\” in the small kitchen playbook, and it makes every other layout tip work better.
Layouts for Common Small Kitchen Shapes
Galley kitchen: dedicate one side to appliances and storage, keep the other side clear for prep and movement. Place the coffee station near one end (away from cooking steam), cooking appliances near the stove, and use the far end for the prep zone.
L-shaped kitchen: use the corner for a permanent appliance station (multi-cooker, air fryer on a corner shelf), keep the longer leg clear for prep, and put the beverage station on the shorter leg near the sink.
One-wall kitchen: go vertical aggressively — wall-mounted everything possible. Use a rolling cart as your flexible second surface. Limit counter appliances to two daily-use heroes; everything else lives in nearby closet or pantry storage.
Small Kitchen Appliance Layout FAQ
How many appliances can a small kitchen hold?
Comfortably: 3–5 countertop appliances with 2–3 in permanent counter positions and the rest stored. Beyond that, consolidation (multi-cookers) and honest frequency audits matter more than additional storage products. Quality of layout beats quantity of gadgets every time.
Where should the microwave go in a small kitchen?
Off the counter if possible — mounted under a cabinet, on a shelf, or in a pantry nook reclaims roughly two square feet of prime counter. If it must sit on the counter, place it at the kitchen\’s periphery (near the fridge for reheating) rather than in the prep zone.
How do I store appliances I rarely use?
Top shelves, pantry floors, or closet storage for monthly-or-less appliances. Use the original boxes or padded bags for protection, keep manuals and attachments together in labeled bins, and do a yearly audit — unused-for-a-year appliances are donation candidates.
Can I put an air fryer under a cabinet?
Only with adequate clearance — most manufacturers specify 4–6 inches on sides, back, and top for heat venting. Pull it forward to the counter\’s edge during use, then push back after cooling. Never operate a high-heat appliance jammed tightly under low cabinets.
What is an appliance garage?
A countertop cabinet with a concealing door (roll-up, lift-up, or pocket doors) that hides small appliances while keeping them plugged in and ready. It delivers the visual calm of clear counters with the convenience of instant access — the best of both worlds for toaster, coffee, and similar daily appliances.
How do I add outlets to a small kitchen cheaply?
Slim under-cabinet power strips ($30–$60) add outlets exactly where appliances work, without electrician costs. For renters, they mount with adhesive or screws into cabinet bottoms. Ensure total load stays within the circuit\’s capacity — distribute high-wattage appliances across different circuits.
Should small kitchens use open shelving?
Selectively. Open shelving near the cooking zone keeps daily items visible and reachable, and it makes small kitchens feel larger. But it collects grease and dust — reserve it for frequently used items that get washed regularly, and keep lesser-used things behind closed doors.
What is the best layout for a very small galley kitchen?
Keep one side clear for prep and movement while concentrating appliances on the other side. Place the coffee station at one end near the sink, cooking appliances near the stove, and protect the largest clear counter stretch as your sacrosanct prep zone. A rolling cart adds flexible overflow surface that tucks away when not needed.
How do I make my small kitchen look bigger?
Clear counters are the biggest visual win — store rarely used appliances out of sight. Light colors, under-cabinet lighting, and a few well-chosen displayed items (rather than cluttered collections) create spaciousness. Mirrored or glass elements and consistent container decanting also reduce visual noise significantly.
