
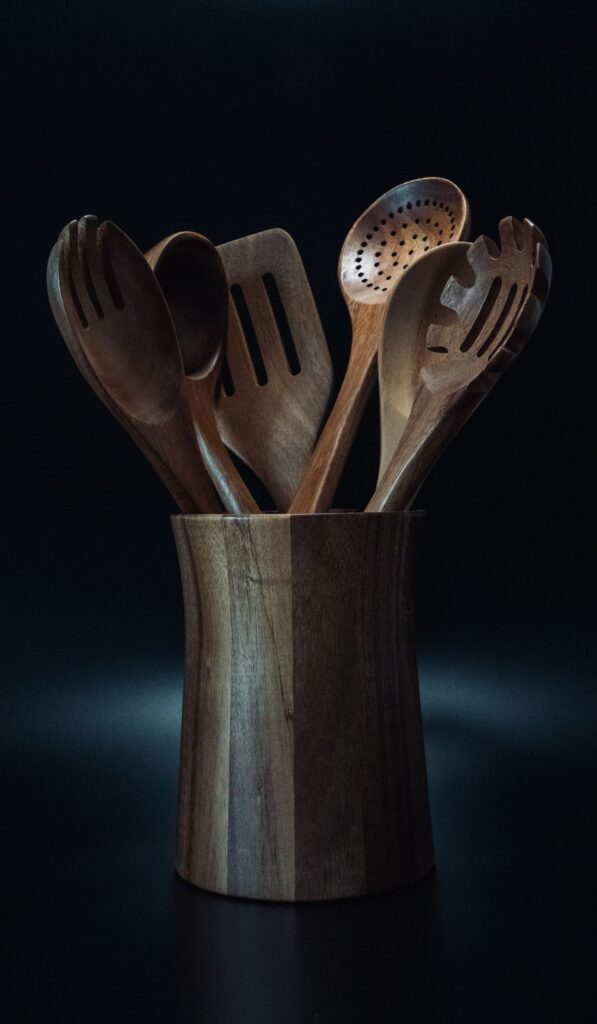
That crack splitting your favorite wooden spoon is not bad luck — it is physics, and it is preventable. Learning how to clean wooden spoons correctly comes down to one principle: wood cracks when it absorbs water unevenly and dries unevenly, so every step of washing, drying, and conditioning should keep moisture moving in and out gradually and symmetrically. This guide gives you the exact daily routine, the monthly oiling ritual that keeps spoons supple for years, and the rescue techniques for spoons that are already looking thirsty — plus the seven mistakes that cause nearly every crack.
Why Wooden Spoons Crack: The Science in 60 Seconds
Wood is a bundle of tiny straw-like fibers that swell when wet and shrink as they dry. When a spoon soaks in water — or sits in a dishwasher\’s prolonged hot spray — water penetrates deep into the grain and the fibers swell. Then, as the spoon dries, the outer surface dries and shrinks first while the interior is still swollen. That differential shrinkage creates internal stress, and when the stress exceeds the wood\’s strength, the fibers separate: a crack. Heat accelerates the cycle, which is why dishwashers and \”just let it soak overnight\” are the two great spoon-killers. The entire cleaning method below is engineered to minimize deep water penetration and maximize even drying — which is all crack prevention really is.
Step-by-Step: How to Clean Wooden Spoons Daily
- Wash immediately after use. Do not let food dry onto the spoon. Dried food demands aggressive scrubbing, and aggressive scrubbing roughens the grain, creating micro-texture that absorbs more water next time. A prompt wash is a gentle wash.
- Use hot water, mild dish soap, and a soft sponge. Hot water cuts grease effectively; mild soap cleans without stripping the wood\’s natural oils aggressively. Use the soft side of the sponge or a vegetable brush — never the abrasive scouring side, which scratches the surface and opens the grain to deeper water penetration.
- Wash quickly and rinse thoroughly. The whole process should take under a minute. Speed matters because every additional minute of water contact drives moisture deeper into the fibers. Rinse well — soap residue left in the grain attracts moisture from the air and can turn gummy over time.
- Never soak. Ever. This deserves its own step because it is the number one cause of cracked spoons. Even 20 minutes of soaking drives water deep enough to start the uneven-drying stress cycle. If food is stuck, hold the spoon under hot running water and scrub — running water cleans without the deep penetration of standing water.
- Keep them out of the dishwasher. The dishwasher combines everything wood hates: prolonged hot water exposure, harsh detergents, and intense heat-drying. One cycle will not kill a spoon, but the damage is cumulative — each cycle drives the grain a little further toward warping, cracking, and a fuzzy, raised texture. Hand-washing takes 45 seconds; the dishwasher costs you the spoon within a year.
Drying: The Step Most People Get Wrong
Washing gets the attention, but drying is where cracks are actually born. Follow this routine every time:
- Towel-dry immediately. Do not leave the spoon sitting wet. A quick rub with a clean towel removes the surface water that would otherwise soak in during the first minutes of air-drying.
- Stand upright or lay flat with airflow. Place spoons upright in a ventilated crock, or lay them on a drying rack where air circulates around all sides. The critical error is leaving a spoon flat on a wet counter or in a puddle — the bottom stays wet while the top dries, which is textbook uneven drying and a direct path to warping and cracking.
- Never store damp. A spoon that feels even slightly damp does not go in the drawer. Trapped moisture in an enclosed drawer invites mold in the grain and continues the swell-shrink cycle in the dark. When in doubt, give it another hour of air.
- Keep spoons away from sustained heat. Do not store wooden spoons leaning against a hot oven, on top of a radiator, or in direct scorching sun for hours. Rapid, intense drying shrinks the surface violently while the interior lags — the same differential stress as uneven air-drying, accelerated.
The Monthly Oiling Ritual (Non-Negotiable for Long Life)
Oiling is what separates three-year spoons from ten-year spoons. Wood\’s natural oils wash out gradually with use; conditioning replaces that lost protection.
What oil to use
Use food-grade mineral oil only. It is tasteless, odorless, colorless, and — critically — it never goes rancid. Cooking oils (olive, coconut, vegetable, flaxseed) seem natural but oxidize inside the wood grain over weeks, turning sticky and developing off smells that transfer to food and cannot be washed out. Tung oil and walnut oil are used by some woodworkers but carry allergy concerns and application complexity; food-grade mineral oil is the simple, safe, universally recommended choice. A bottle of food-grade mineral oil for cutting boards costs a few dollars and lasts years.
How to oil
- Start with a clean, completely dry spoon. If the surface feels rough, lightly sand with 220-grit sandpaper with the grain first — never across it.
- Apply a generous coat of mineral oil with a soft cloth or paper towel, rubbing with the grain. Do not be shy; the wood should look wet.
- Let it soak for at least 4 hours, ideally overnight, standing upright so oil does not pool on one side.
- Wipe off all excess with a clean cloth. The spoon should feel silky, not oily.
- For very dry spoons, repeat the process two or three nights in a row — thirsty wood drinks deeply the first time.
How often
Monthly for daily-use spoons; every two to three months for occasional ones. The visual cue is reliable: when wood looks pale, matte, and thirsty instead of rich and satiny, it is asking for oil. Spoons used for high-heat stirring or tomato-based sauces need oiling more often, since heat and acidity strip conditioning faster.
The beeswax upgrade
After oiling, some cooks apply a thin coat of a beeswax-and-mineral-oil conditioner (often sold as \”board butter\”). The wax adds a water-repellent top layer over the oil\’s deep conditioning — belt and suspenders for spoons that live hard lives. Warm the spoon slightly first so the wax spreads thin and even.
Sanitizing Wooden Spoons Without Damage
Wood is naturally somewhat antimicrobial — studies have shown bacteria die off faster on wood than on plastic — but spoons used with raw meat deserve sanitizing. Safe methods:
- Hydrogen peroxide (3%): Wipe on, wait 5 minutes, rinse, dry promptly. Effective and wood-safe at this concentration.
- White vinegar: Wipe or spritz undiluted, wait 10 minutes, rinse. The acetic acid kills most common kitchen bacteria.
- Lemon and salt scrub: Rub with half a lemon dipped in coarse salt for odor removal plus mild sanitizing — the classic board-and-spoon refresher.
- Baking soda paste: For deodorizing, coat with a paste of baking soda and water, wait 15 minutes, rinse.
Avoid bleach on wooden spoons: it degrades wood fibers, can leave residues trapped in the porous grain, and the \”sanitizing\” benefit does not outweigh the material damage. A few hours of direct sunlight is a fine supplementary sanitizer — UV light is naturally antimicrobial and freshens wood beautifully.
Rescuing Dried-Out, Stained, or Rough Spoons
A neglected spoon is rarely a lost spoon. Work through these rescues in order:
- Deep rehydration: Give a very dry spoon three consecutive nightly oilings. Seriously thirsty wood may drink an astonishing amount of oil the first night — that is normal and exactly what it needs.
- Sanding: For rough, fuzzy grain or surface stains, sand lightly with 220-grit sandpaper, always with the grain, then wipe clean and oil. Sanding removes the damaged outer layer and exposes fresh wood. Follow with 320-grit for an extra-silky finish if you are feeling thorough.
- Stain treatment: Turmeric, berry, and tomato stains respond to a baking soda paste left on for 15–30 minutes, or to the baking soda plus hydrogen peroxide paste with a few hours of sunlight. Deep-set stains may lighten but not vanish entirely — consider them patina, the honorable scars of a working spoon.
- Odor removal: The lemon-and-salt scrub handles garlic and onion; a baking soda soak (not a water soak — a damp paste coating) handles deeper smells. Sunlight finishes the job.
Know when to retire a spoon: deep cracks that catch food and cannot be sanded out, black mold that persists after sanding, or a loose head on a glued spoon. A cracked spoon harbors bacteria in the fissure beyond any cleaning\’s reach — that one becomes a plant marker, not a cooking tool.
7 Mistakes That Crack Wooden Spoons
- Soaking in the sink. The number one killer. Standing water penetrates deep; deep water means violent uneven drying.
- The dishwasher. Prolonged hot water plus harsh detergent plus heat-drying: everything wood hates, combined.
- Leaving them in a hot pan. Resting a spoon in a screaming-hot skillet or leaving it in boiling liquid chars and desiccates the wood, creating brittle zones that crack under stress.
- Conditioning with cooking oils. Olive and vegetable oils go rancid in the grain, turning spoons sticky and smelly — damage no washing reverses.
- Storing while damp. Enclosed damp storage grows mold and continues the swell-shrink cycle where you cannot see it.
- Scrubbing with abrasives. Steel wool and scouring pads shred the grain surface, opening it to deeper water penetration every future wash.
- Never oiling at all. Unconditioned wood slowly loses its natural oils to hot water and soap until it becomes brittle and crack-prone. Oiling is maintenance, not luxury.
Choosing Wooden Spoons That Last
Care matters most, but starting with good wood helps. Look for spoons made from hard, tight-grained woods: olive wood, beech, maple, and cherry all outperform soft, open-grained woods. The spoon should feel dense and smooth, with no rough patches or visible glue lines at the neck (one-piece construction is strongest). Thicker handles resist warping better than thin ones. Avoid \”bamboo\” spoons marketed as wood — bamboo is a grass with different care needs and a tendency to splinter with age. A quality olive wood spoon set, properly maintained with the routine above, can genuinely last a decade of daily cooking.
Frequently Asked Questions
How often should I oil my wooden spoons?
Once a month for daily-use spoons, every two to three months for occasional ones. The reliable visual test: if the wood looks pale, dry, and matte rather than rich and satiny, oil it now regardless of schedule. Spoons used in high heat or acidic sauces need oiling more often, since heat and acid strip conditioning faster.
Can I use olive oil instead of mineral oil on wooden spoons?
You should not. Olive oil and other cooking oils oxidize and turn rancid inside wood grain within weeks, leaving spoons sticky and foul-smelling in a way no washing fixes. Food-grade mineral oil never goes rancid, has no taste or smell, and is the conditioner professional woodworkers recommend. It is inexpensive and one bottle lasts years.
Is it safe to use a wooden spoon with a small crack?
A hairline surface crack that does not catch food is generally fine — sand it smooth, oil well, and monitor it. A deep crack that traps food particles is not safe, because bacteria colonize the fissure beyond the reach of any cleaning. When a crack deepens or the spoon develops black discoloration inside the crack, retire it from food duty.
Why did my new wooden spoon get rough after the first wash?
That is raised grain, and it is completely normal. Water swells the wood fibers unevenly, and some stand proud of the surface as they dry. Lightly sand with 220-grit sandpaper with the grain, wipe clean, and apply mineral oil. Most spoons need this sanding once or twice when new; afterward the grain stabilizes and stays smooth with regular oiling.
Can wooden spoons go in the microwave?
Briefly, yes — a wooden spoon will not spark or melt — but there is little reason to do it and repeated microwaving desiccates wood rapidly, accelerating cracking. The microwave\’s intense, uneven heating is essentially a fast-forward version of the uneven-drying stress that cracks spoons. Use wood for stirring and serving; use microwave-safe glass or silicone for microwave tasks.
What is the black stuff on my old wooden spoon?
Usually three things: mold from damp storage, deeply embedded food staining, or charring from high heat. Try sanding — if it sands away to clean wood, it was surface-level; oil afterward. If black discoloration persists deep in the grain after sanding, that is likely mold and the spoon should be retired.
