
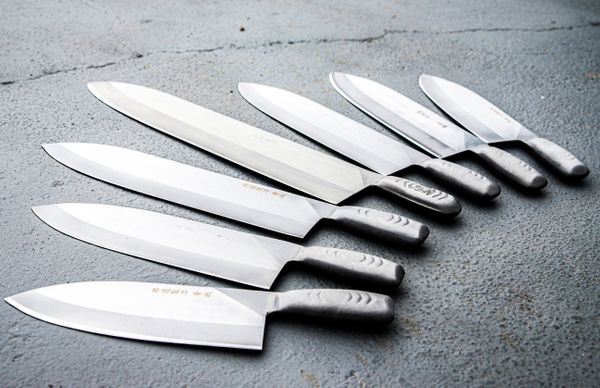
Learning how to sharpen a knife with a whetstone comes down to one core skill: holding a consistent angle. The full process: soak the stone (if required), hold the blade at a steady 15–20 degree angle, push the edge across the stone in smooth strokes, sharpen one side until you feel a burr along the entire edge, repeat on the other side, progress to finer grits, and finish with light stropping strokes. It takes 10–15 minutes once learned, and the skill lasts a lifetime.
Whetstone sharpening looks intimidating but it\’s fundamentally simple — the only real skill is holding a consistent angle. This guide breaks it into clear steps: choosing your stone, setting up, finding the angle, forming the burr (the key signal most beginners miss), refining through grits, and testing sharpness. No prior experience needed; just a whetstone, a knife, and a little patience.
What You\’ll Need
- A combination whetstone — 1000/6000 grit is the ideal starter (1000 shapes the edge, 6000 polishes). See our knife sharpener guide for recommendations.
- A flat, stable surface — the stone\’s base or a damp towel underneath prevents slipping, which is both a safety and consistency issue.
- Water — a bowl or squeeze bottle for keeping the stone wet; water carries away metal swarf and prevents clogging.
- A dull knife to practice on — start with an inexpensive chef\’s knife, not your best Japanese blade.
- A towel — for drying the knife and wiping the stone.
- Optional: an angle guide (clips on the spine), a flattening stone, and a leather strop for finishing.
Step 1: Prepare Your Stone
Traditional water stones need soaking: submerge in water for 5–10 minutes until bubbles stop rising — the stone is saturated when the bubbling ceases. \”Splash-and-go\” stones (like the Shapton Pro) just need their surface wetted. Place the stone on its base or a damp towel — it must not move during sharpening. A sliding stone is dangerous and makes consistent angles impossible. Keep water handy; the surface should stay wet throughout, with a thin slurry developing as you work.
Which Grit to Start With?
Start with the medium/coarse side (around 1000 grit) for any knife that\’s dull but undamaged. Only reach for coarse stones (200–600) for chipped edges or very neglected blades — they remove metal fast. The fine side (3000–8000) refines and polishes after the edge is established. Beginners: 90% of your work happens on the 1000-grit side.
Step 2: Find and Hold Your Angle
The angle between blade and stone determines your edge: 20 degrees per side for Western chef\’s knives (durable), 15 degrees for Japanese knives (keener). To visualize 20 degrees: hold the knife perpendicular to the stone (90°), halve to 45°, then halve again to roughly 22° — close enough. For 15°, go slightly lower than that.
Consistency matters more than exactness. A steady 22° beats a wobbling 15–25°. Lock your wrists and move from the shoulders; many beginners find it helps to color the edge bevel with a marker — sharpen a few strokes, then check where the marker wore off. Even removal means your angle is consistent; marker remaining at the very edge means your angle is too shallow, at the shoulder means too steep.
Consistency beats exactness: a steady 22° outperforms a wobbling 15–25°. The marker trick — color the bevel, sharpen, check wear — reveals your actual angle instantly.
Step 3: Sharpen the First Side Until You Feel the Burr
Place the heel of the blade on the stone\’s far edge, edge facing away from you. With moderate pressure (about the weight of your hand — not your body), push the blade forward and across the stone as if shaving a thin layer off, sweeping so the entire edge — heel to tip — contacts the stone. Work in sections: heel, middle, tip, overlapping slightly. The tip needs a slight lift of the handle to maintain the angle as the blade curves.
After several strokes, check for the burr: run your fingertip gently across (never along) the edge on the opposite side from the stone. You\’ll feel a slight catch or wire edge — that\’s the burr, a thin flap of metal pushed over the apex. The burr must run the entire length of the edge before you switch sides; a partial burr means a partially sharpened knife. This is the step beginners rush — patience here determines everything.
How Many Strokes?
There\’s no number — it depends on dullness. A maintenance sharpening might need 10–20 strokes per side; a very dull knife might need 50+. Let the burr be your guide, not a count. If you\’re making no progress after many strokes, your angle is likely too shallow (grinding the shoulder, not the edge) — steepen slightly.
Step 4: Sharpen the Second Side
Flip the knife and repeat the same process on the other side, using the same angle and stroke pattern, until you feel the burr flip to the first side along the full length. Use slightly lighter pressure than the first side — you\’re refining now, not reshaping. Once the burr has flipped fully, the edge is apexed on both sides: the fundamental sharpening work is done.
Step 5: Refine and Remove the Burr
Now reduce the burr with alternating light strokes: 5 strokes per side, then 3, then 1, decreasing pressure each time until you\’re barely touching the stone. Flip to your fine grit (6000) and repeat with very light pressure — 10–15 alternating strokes. The fine stone polishes the bevel and removes the remaining burr fragments.
Finish with stropping: a few trailing strokes (edge trailing, spine leading) on the fine stone, a leather strop, or even cardboard. Stropping aligns the microscopic edge without removing metal. Then wash the knife (removing all metal particles), dry thoroughly, and test.
Step 6: Test Your Edge
- Paper test: A sharp knife slices newsprint or printer paper cleanly with light pressure. Push-cutting (no slicing motion) indicates a very keen edge.
- Tomato test: The practical kitchen test — a sharp knife bites into tomato skin with almost no pressure; a dull one skates.
- Thumbnail test: Gently rest the edge on your thumbnail at an angle — a sharp edge bites and stops; a dull edge slides. Use minimal pressure.
- Arm hair test: A truly refined edge shaves arm hair. Fun to try, unnecessary for kitchen work.
Common Beginner Mistakes
- Rocking the angle: The #1 mistake. Wrists flex during strokes, rounding the edge. Lock wrists, move from shoulders, use the marker trick.
- Too much pressure: Heavy pressure digs the edge into the stone and rounds it. Let the abrasive work — pressure should decrease as grits get finer.
- Skipping the burr: Switching sides before the burr forms fully leaves sections unsharpened. Feel for it along the whole edge.
- Neglecting the tip and heel: These get fewer strokes naturally. Give them deliberate attention — they\’re the most-used parts.
- Dry stone: A dry stone clogs with swarf and cuts poorly. Keep it wet; the slurry is supposed to be there.
- Wrong starting grit: Polishing a dull edge on 6000 grit wastes time; repairing on 200 grit removes years of steel. Match grit to condition.
Whetstone Care and Maintenance
Rinse stones after use and air-dry completely before storing — trapped moisture can crack some stones in freezing conditions. Flatten regularly: stones dish in the middle with use, and a dished stone sharpens unevenly. Use a flattening stone, coarse diamond plate, or wet/dry sandpaper on flat glass, marking the surface with pencil grid lines to see high spots. Store stones where they won\’t bang together; chips in the stone transfer to your edge.
How Often to Sharpen (vs Hone)
Hone with a rod before most uses — it realigns the edge without removing metal. Sharpen on stones only when honing stops restoring performance: typically every 2–6 months for home cooks, depending on use, cutting surfaces, and steel hardness. A full progression (1000 → 6000) takes 10–15 minutes once you\’re practiced; a quick 1000-grit touch-up takes 5. The paper test tells you when it\’s time.
Whetstone Sharpening FAQs
What angle should I sharpen a kitchen knife at?
20 degrees per side for Western-style chef\’s knives (durable all-purpose edge); 15 degrees per side for Japanese knives (keener, more delicate). Harder steels (60+ HRC) hold acute angles well; softer steels do better at 20°. When in doubt, match the existing bevel — the marker trick reveals it.
Do you push or pull on a whetstone?
Both work — the standard technique pushes edge-first (as if shaving the stone), but many sharpeners use edge-trailing strokes, especially for finishing. What matters is consistent angle and full edge contact, not direction. Use whichever feels controlled, and keep the stone wet either way.
How do I know when my knife is sharp enough?
The burr forming fully on each side tells you the edge is apexed — that\’s \”sharp.\” Refinement through finer grits and stropping takes it from sharp to keen. The paper test is the practical check: clean slicing with light pressure means you\’re done for kitchen purposes.
Can I ruin my knife with a whetstone?
It\’s very hard to truly ruin a knife — the realistic risks are scratching the blade face (cosmetic) and, with very coarse stones and heavy pressure, removing more steel than needed. You won\’t destroy the heat treatment or geometry with normal hand sharpening. Practice on an inexpensive knife first and you\’ll be fine.
Soak or splash-and-go whetstone — which is better?
Neither is inherently better — it\’s convenience versus tradition. Soaking stones (many King, Suehiro) are affordable and give great feedback; splash-and-go (Shapton Pro, Naniwa Professional) are ready instantly and dish slower. Beginners often prefer splash-and-go for simplicity; traditionalists prefer the feel of soakers.
Why is my knife still dull after whetstone sharpening?
Almost always one of three causes: no full burr formed (stopped too early), inconsistent angle (rounded the edge instead of apexing), or a remaining wire edge/burr that needs stropping off. Revisit the marker trick to diagnose your angle, ensure the burr runs the full length, and finish with light alternating strokes plus stropping.
How long does it take to learn whetstone sharpening?
Expect usable results within your first 2–3 sessions and genuine proficiency within a month of occasional practice. The angle-holding muscle memory develops fast; burr detection is the skill that takes a few tries. It\’s a lifetime skill — an hour of practice pays off for decades.
Single-Bevel vs Double-Bevel: Know Your Knife
Most Western and general-purpose Japanese knives are double-bevel — ground on both sides, sharpened as this guide describes with roughly equal work per side (or a 70/30 ratio for many Japanese double-bevels). Traditional Japanese knives like yanagiba and deba are single-bevel — ground almost entirely on one side with a concave back (urasuki) on the other. Single-bevel sharpening is a different technique: work the beveled side predominantly, then lay the back flat on the stone for a few light strokes to remove the burr.
Don\’t apply double-bevel technique to a single-bevel knife — you\’ll destroy its geometry. If you own single-bevel Japanese knives, they\’re worth learning specifically (or sending to a professional). For everyone else with double-bevel knives, this guide\’s method is exactly right.
Stropping Deep Dive: The Final 5%
Stropping is what separates \”sharp\” from \”scary sharp.\” After your finest stone, the edge retains a microscopic wire burr; stropping trailing strokes (spine leading, edge following — the opposite of sharpening direction) on leather, balsa wood charged with stropping compound, or even cardboard realigns and removes it. Use almost no pressure — the strop\’s job is polishing, not grinding. Ten to fifteen strokes per side on leather with green chromium oxide compound produces a mirror-polished, push-cutting edge.
No strop? The cardboard trick works surprisingly well: 20 trailing strokes per side on clean corrugated cardboard refines an already-sharpened edge noticeably. And newspaper on a flat surface serves as a field-expedient strop. Stropping maintains edges between sharpenings too — a quick strop session can postpone full sharpening by weeks.
