
Affiliate Disclosure: As an Amazon Associate I earn from qualifying purchases.
n
To deep clean kitchen grease and grime in one weekend, work top-to-bottom and zone-by-zone: Saturday handles decluttering, cabinet exteriors, the range hood, and major appliances, while Sunday covers the refrigerator interior, sink and dishwasher, pantry, and floors. This order keeps you from re-dirtying finished areas, and most kitchens can be fully deep-cleaned in six to eight hours spread over two days.
A deep clean is different from your daily wipe-down. It targets the greasy film on cabinet fronts, the crumbs behind the toaster, the sticky shelves inside the fridge, and the grime hiding under the range hood — the jobs that build up silently and make a kitchen feel dingy even when the counters are clear. This guide gives you a realistic weekend plan with exact steps, the right cleaners for each surface, and a maintenance routine so you never need another marathon session again.
What “Deep Clean” Means (and What It Doesn’t)
Deep cleaning a kitchen means cleaning the places routine cleaning misses: inside appliances, behind and under movable items, the tops of cabinets, vent filters, and grout lines. It does not mean renovating, reorganizing your entire pantry from scratch, or scrubbing until every surface is sterile. Set the bar at “every surface and appliance addressed once,” and you’ll finish.
Before you start, understand the three soil types in a kitchen, because each needs a different approach:
| Soil type | Where it builds up | Best cleaner |
|---|---|---|
| Grease film | Cabinet fronts near the stove, range hood, backsplash, light fixtures | Dish soap solution or degreaser; baking soda paste for buildup |
| Food residue | Microwave interior, oven, fridge shelves, sink, small appliances | Hot soapy water; vinegar solution for mineral deposits |
| Dust and crumbs | Tops of cabinets, behind appliances, pantry shelves, light covers | Microfiber cloths, vacuum with brush attachment |
Your Weekend Deep-Clean Kit
Gather everything before Saturday morning so you never stall mid-task hunting for supplies. You need fewer products than marketing suggests — a small kit covers the whole kitchen:
- Dish soap (a grease-cutting formula) — your primary degreaser for most surfaces
- White distilled vinegar — mineral deposits, glass, deodorizing
- Baking soda — gentle abrasive for stuck-on grime, deodorizer for the fridge and trash can
- All-purpose spray — for quick passes on counters and appliance exteriors
- Oven cleaner or a baking soda paste — for the oven interior (check your oven’s manual first)
- Microfiber cloths (at least six) — one for greasy jobs, one for glass, the rest for general wiping
- An old toothbrush or small detailing brush — grout, seals, hinges, and crevices
- A bucket, a spray bottle, and rubber gloves
- A step stool — for cabinet tops and light fixtures
microfiber cleaning cloths pack Check Price on Amazon → and extendable duster Check Price on Amazon → make the high zones far easier, and a grout brush set Check Price on Amazon → earns its keep around the sink and backsplash. Avoid mixing vinegar with castile soap (it curdles) and never mix bleach with vinegar or ammonia-based cleaners.
Saturday Morning: The Game Plan
Saturday is the heavy day — roughly four hours. The golden rule is top to bottom, dry to wet, back to front. Dust and degrease high surfaces first so debris falls onto areas you haven’t cleaned yet, and always finish a zone before moving on.
| Time block | Zone | Main tasks |
|---|---|---|
| 9:00–9:30 | Whole kitchen | Declutter counters; empty trash; load/start dishwasher |
| 9:30–11:00 | High zones | Cabinet tops, range hood and filter, light fixtures, window sills |
| 11:00–12:30 | Cooking zone | Cabinet fronts, backsplash, stovetop, oven exterior, small appliances |
| 12:30–1:00 | Lunch break — let oven cleaner or degreaser dwell | |
| 1:00–2:30 | Oven + microwave | Oven interior, microwave interior, toaster crumb tray |
Step 1: Declutter and Clear the Decks
Start by removing everything from the countertops — small appliances you rarely use, mail, the fruit bowl, all of it. Wipe each item as you move it; you’ll be shocked how much dust collects under a stand mixer. Pull out the trash and recycling, and run a load of dishes so the sink and dishwasher are empty and ready as your cleaning staging area.
Do a fast sort while you declutter: expired spices, stale crackers, and mystery containers go straight in the trash. This isn’t a full pantry overhaul (that’s Sunday), but clearing obvious dead weight now makes every later step faster. Keep a “donate” box and a trash bag within arm’s reach.
Step 2: Tackle the High Zones
Cabinet tops, the range hood, and light fixtures collect a sticky layer of airborne grease mixed with dust — the grimiest surface in most kitchens. Work with a damp microfiber cloth and dish soap solution, wringing well. For cabinet tops, lay old towels or newspaper first to catch falling debris, then wipe.
The range hood filter deserves special attention: most metal mesh filters can soak in a sink of hot water with dish soap and baking soda for 20 minutes, then get scrubbed with a brush and air-dried. A clogged filter makes the fan work harder and lets more grease settle on surrounding surfaces. Wipe the hood’s exterior with a degreaser, going with the grain on stainless steel to avoid streaks.
Don’t Forget These Overlooked Spots
- Light fixture covers and the bulbs themselves (dust dims light noticeably)
- The top of the refrigerator
- Window sills and the kitchen windows’ interior glass
- Cabinet and drawer handles — touchpoints that collect hand oils
- Light switch plates and the edges of electrical outlets near the stove
Step 3: Degrease Cabinet Fronts and the Backsplash
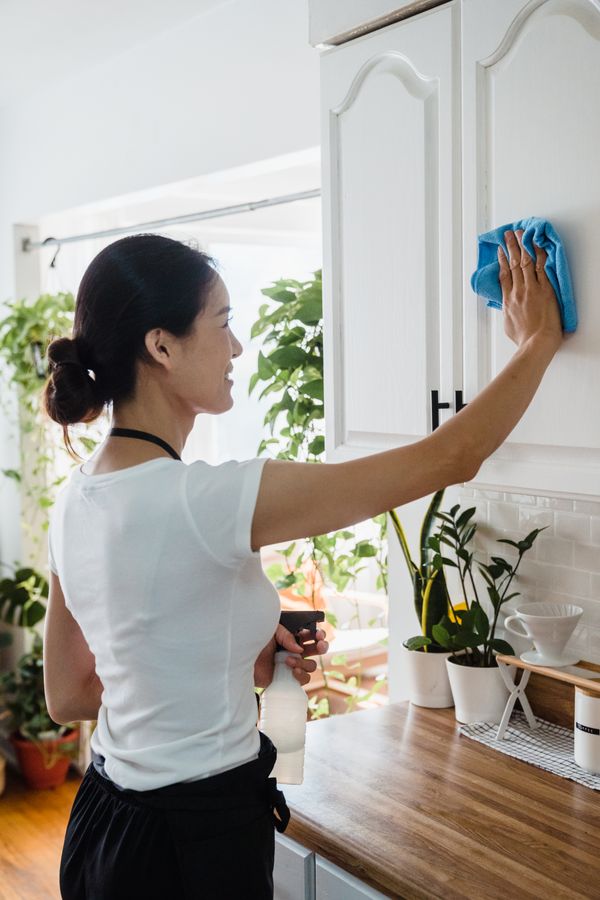
Kitchen cabinets near the stove develop a tacky film that all-purpose spray barely dents. Mix a few drops of dish soap in warm water, wring your cloth nearly dry, and wipe a small test area first — especially on painted or stained wood. Work in sections, rinsing the cloth frequently so you’re lifting grease, not spreading it.
For stubborn buildup around handles and the stove-adjacent doors, make a paste of baking soda and water, apply it with a soft cloth, and rub gently in circles. Avoid abrasive pads on wood and painted finishes; they’ll dull the surface permanently. Finish with a clean damp cloth to remove residue, then dry with a fresh microfiber cloth to prevent water spots. For the complete method with finish-specific cautions, see our guide to degreasing cabinets.
Step 4: Deep Clean the Cooking Appliances
Stovetop
Remove grates and burner caps (gas) or drip pans (electric coil) and soak them in hot soapy water while you clean the cooktop surface. For glass and ceramic cooktops, use a dedicated cooktop cleaner or a baking soda paste with a non-scratch pad; for gas and coil tops, dish soap solution and a brush handle the baked-on splatter. Dry everything fully before reassembling to prevent rust and streaks.
Oven
If your oven is self-cleaning, run the cycle per the manual — but never leave the house during it, and ventilate well. For manual cleaning, apply oven cleaner or a thick baking soda paste to the interior (avoiding heating elements and the door gasket), let it dwell for several hours or overnight, then wipe out and rinse. Remove and wash the racks separately in the bathtub or a large bin with hot soapy water.
Microwave
Heat a microwave-safe bowl of water with lemon slices or a splash of vinegar for five minutes, let it stand for two more, then wipe the softened splatter away. Remove the turntable and wash it in the sink. This steam method handles 90% of microwave grime with zero scrubbing.
Step 5: Sunday — Refrigerator, Sink, Pantry, and Floors
Sunday is the “inside” day — about three hours. Start with the refrigerator since it takes the longest with food juggling.
Refrigerator and freezer
Work one shelf at a time: pull everything off, check dates, toss the expired, and wipe the shelf with hot soapy water before restocking. Removable shelves and drawers can soak in the sink. Wipe the door seals with a damp cloth and an old toothbrush — mold loves the folds. Finish with an open box of baking soda inside to absorb odors, and vacuum the condenser coils behind or beneath the fridge (unplug first) to help it run efficiently.
Sink, faucet, and dishwasher
Sprinkle baking soda in the sink, scrub with a sponge, then rinse. For stainless steel sinks, follow with a vinegar rinse for shine. Clean the faucet aerator by unscrewing it and soaking it in vinegar to dissolve mineral buildup. Run the dishwasher empty on its hottest cycle with a cup of vinegar on the top rack, and wipe the door seal and filter — the filter traps food that causes odors.
Pantry and food storage
Pull items off one shelf at a time, wipe the shelf, check dates, and group like with like as you restock. Decant open bags of flour, rice, and grains into airtight containers — this single habit prevents pantry moths and keeps staples fresher. Wipe down containers before they go back.
Floors and baseboards
Last, because everything above has been shedding debris onto them. Sweep or vacuum thoroughly, including under the stove and fridge if you can safely pull them out (protect the floor first). Mop with a cleaner appropriate for your flooring — avoid soaking wood or laminate. Wipe baseboards with a damp cloth; a dryer sheet also works to repel future dust.
Keep-It-Clean: The Maintenance Routine
A weekend deep clean is only worth it if you protect the result. This minimal routine keeps the kitchen at about 80% of deep-clean condition indefinitely:
- Daily (10 minutes): wipe counters and stovetop, load or run the dishwasher, take out trash if full, quick sink rinse
- Weekly (30 minutes): mop floors, clean the microwave, wipe appliance exteriors, scrub the sink, change dish towels
- Monthly (1 hour): degrease the range hood filter, wipe cabinet fronts near the stove, clean the dishwasher filter, toss expired fridge items
- Quarterly: repeat a light version of this weekend plan — oven, fridge deep clean, pantry check
Mistakes That Waste Your Weekend
- Cleaning bottom-to-top: dust and drips fall onto finished surfaces, forcing rework. Always start high.
- Using too much product: excess cleaner leaves residue that attracts dirt faster. Less is more; rinse well.
- Scrubbing wood cabinets with abrasives: steel wool and harsh scouring pads permanently dull finishes.
- Skipping dwell time: degreasers and oven cleaners need 10–20 minutes to work. Spray, walk away, then wipe.
- Mixing chemicals: bleach plus vinegar or ammonia creates dangerous fumes. Stick to one chemistry at a time.
- Forgetting ventilation: open windows and run the range hood fan when using strong cleaners.
Frequently Asked Questions
How long does it take to deep clean a kitchen?
Most standard kitchens take six to eight hours of active work split over two days: about four hours Saturday for high zones, cabinets, and cooking appliances, and three hours Sunday for the fridge, sink, pantry, and floors. Very small kitchens can be done in four to five hours total, while large or long-neglected kitchens may need a third half-day.
What is the best order to deep clean a kitchen?
Work top to bottom and dry to wet: declutter first, then high zones (cabinet tops, range hood, lights), then cabinet fronts and backsplash, then appliances, then the refrigerator interior, sink, pantry, and floors last. This sequence prevents dust and drips from dirtying surfaces you already cleaned.
What do professional cleaners use to degrease kitchens?
Pros mostly rely on simple chemistry: hot water with a grease-cutting dish soap for routine degreasing, stronger alkaline degreasers for heavy buildup on range hoods and backsplashes, and baking soda paste as a mild abrasive. They avoid all-in-one products for tough grease because dedicated degreasers with proper dwell time work faster.
How do I deep clean kitchen cabinets without damaging them?
Use a well-wrung cloth with warm water and a few drops of dish soap, testing in an inconspicuous spot first. Avoid soaking wood, abrasive pads, and harsh solvents on painted or stained finishes. For sticky buildup, a baking soda paste applied gently works well. Always dry cabinets after wiping to prevent moisture damage.
Should I clean the oven or the fridge first?
Clean the oven on Saturday and the fridge on Sunday. Oven cleaning involves dwell time and strong cleaners with fumes, so it pairs well with Saturday’s ventilated appliance work. The fridge goes Sunday because you’ll be in and out of it while cooking weekend meals, and a Sunday clean means it starts the week fresh and organized.
How often should you deep clean your kitchen?
A full deep clean every three to four months is right for most households, with monthly attention to grease-prone spots like the range hood filter and stovetop-adjacent cabinets. Daily 10-minute tidy-ups and a weekly 30-minute clean prevent the buildup that makes deep cleaning feel overwhelming.
Can I deep clean my kitchen with just vinegar and baking soda?
Mostly, yes: baking soda handles scrubbing and deodorizing, vinegar cuts mineral deposits and shines glass, and dish soap covers grease. The exception is heavy baked-on oven grime and thick grease on range hood filters, where a dedicated oven cleaner or alkaline degreaser saves significant time and effort.
What should I throw away during a kitchen deep clean?
Toss expired spices (they lose potency after about a year), stale opened dry goods, condiments past their prime, mystery freezer items older than six months, worn-out sponges, and any chipped or cracked food-storage containers. When in doubt about a refrigerated item’s safety, follow the “when in doubt, throw it out” rule.
